
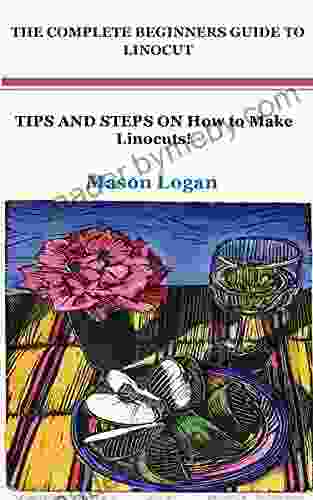
Dive into the Art of Linocut: Your Complete Beginner's Guide to Crafting Expressive Prints

Embark on a captivating journey into the realm of linocut, an accessible and rewarding art form that allows you to create stunning prints with your own unique style. This comprehensive beginner's guide will unravel the intricacies of linocut, providing you with all the knowledge and techniques you need to unleash your inner artist.
4.4 out of 5
| Language | : | English |
| File size | : | 913 KB |
| Text-to-Speech | : | Enabled |
| Screen Reader | : | Supported |
| Enhanced typesetting | : | Enabled |
| Print length | : | 17 pages |
| Lending | : | Enabled |
What is Linocut?
Linocut is a type of relief printmaking where a design is carved into a sheet of linoleum, a durable material made from linseed oil and cork dust. The carved areas remain raised, while the uncarved areas are inked and transferred to paper under pressure. This creates striking prints with bold lines, expressive textures, and a distinctive handmade aesthetic.
Materials You Will Need
- Linoleum: Choose a sheet of linoleum that is firm and smooth, with a thickness suitable for your project.
- Carving Tools: Specialized linoleum carving tools, such as gouges and knives, allow you to create intricate designs with precision.
- Ink: Black or colored printing ink specifically designed for linocut is essential.
- Brayer: A rubber or plastic brayer helps you evenly distribute ink onto the linoleum.
- Paper: Choose high-quality printmaking paper that will absorb the ink well and yield crisp results.
- Barren: A spoon or other rounded object used to transfer ink to the paper.
- Press or Rubbing Tool: A printing press or a wooden spoon can be used to apply pressure and transfer the ink from the linoleum to the paper.
Step-by-Step Guide to Linocut
1. Sketching the Design:
Begin by sketching your desired design directly onto the linoleum using a pencil or marker. Remember that the carved areas will print white, while the uncarved areas will print black or colored.
2. Carving the Linoleum:
Hold the carving tool at a 45-degree angle and carefully carve away the linoleum around the design, leaving the areas you want to print raised. Use different gouges and knives to create lines of varying widths and textures.
3. Inking the Linoleum:
Apply a thin layer of ink onto a smooth surface. Use a brayer to roll out the ink evenly, taking care not to leave any air bubbles.
4. Transferring the Image:
Place the inked linoleum face down on a sheet of paper and cover it with a clean sheet of paper or fabric. Use a barren or rubbing tool to apply pressure and transfer the ink from the linoleum to the paper.
5. Finishing the Print:
Slowly peel back the paper to reveal your finished linocut print. Let it dry completely before handling or framing it.
Tips for Beginners
* Start with simple designs to get the hang of carving and printing. * Experiment with different carving tools to create various textures and effects. * Apply multiple layers of ink for deeper colors and richer prints. * Use a press for even pressure and consistent results. * Practice regularly to improve your skills and explore your creativity.
With this comprehensive beginner's guide, you are now equipped to delve into the fascinating world of linocut. Embrace the art of carving and printing, and unleash your artistic potential through the expressive medium of linocut. Whether you create abstract patterns, intricate landscapes, or compelling portraits, let your imagination soar and witness the magic of your own handmade prints.
Additional Resources
- Linocut Tutorial for Beginners
- The Linocut Society
- The Complete Beginner's Guide to Linocut
Image Alt Attributes
* A woman carving a design into a sheet of linoleum. * A close-up of a linoleum block with carved lines and textures. * A finished linocut print of an intricate geometric pattern. * A series of colorful linocut prints depicting abstract shapes and forms.
4.4 out of 5
| Language | : | English |
| File size | : | 913 KB |
| Text-to-Speech | : | Enabled |
| Screen Reader | : | Supported |
| Enhanced typesetting | : | Enabled |
| Print length | : | 17 pages |
| Lending | : | Enabled |
Do you want to contribute by writing guest posts on this blog?
Please contact us and send us a resume of previous articles that you have written.
 Book
Book Novel
Novel Page
Page Chapter
 Text
Text Story
Story Genre
Genre Reader
 Library
 Paperback
 E-book
 Magazine
 Newspaper
 Paragraph
 Sentence
 Bookmark
 Shelf
Shelf Glossary
 Bibliography
 Foreword
 Preface
 Synopsis
 Annotation
 Footnote
 Manuscript
 Scroll
 Codex
Codex Tome
Tome Bestseller
 Classics
 Library card
 Narrative
 Biography
 Autobiography
 Memoir
 Reference
 Encyclopedia
 Timothy Zahn
 Paul Galdone
 Sophia Glock
 Wayne L Winston
 Tulku Urgyen Rinpoche
 Lilac Mills
 Sue Stauffacher
 William Rosen
 Peter James West
 Zubeida Jaffer
 Nick Jans
 Martha Hall Kelly
 M Kevin Davis
 Mary R Dunn
 L M Sutter
 Linda West
 William Black
 Stephanie Bergeron
 Robert Kiltz
 Peter Turchin
Light bulbAdvertise smarter! Our strategic ad space ensures maximum exposure. Reserve your spot today!


 David BaldacciMaximize Your Score Get Into Med School: The Ultimate Guide to Crushing the...
 Colin RichardsonFollow ·7.8k
 Richard SimmonsFollow ·12.6k
 Bill GrantFollow ·14.8k
 Art MitchellFollow ·10.8k
 Amir SimmonsFollow ·15.6k
 Stephen FosterFollow ·14k
 Corey GreenFollow ·13k
 Isaac AsimovFollow ·6.7k
 Wayne Carter
The Beginner's Guide to Making an Old Motor Run Forever
If you're like most...

 Deacon Bell
Nepali Adventure: Kings and Elephant Drivers,...
In the heart of the...

 Carlos Drummond
The Romantic Revolution: A Journey Through History and...
Unveiling the...

 Kazuo Ishiguro
Unlock Your Inner Innovator: Dive into the New Wave...
Embark on a Transformative Journey of...
 William Golding
Crazy Horse: The Lakota Warrior's Life and Legacy
In the annals of Native...

 Hector Blair
Mildred and Richard Loving: The Inspiring Story of...
Mildred and Richard Loving were an...
4.4 out of 5
| Language | : | English |
| File size | : | 913 KB |
| Text-to-Speech | : | Enabled |
| Screen Reader | : | Supported |
| Enhanced typesetting | : | Enabled |
| Print length | : | 17 pages |
| Lending | : | Enabled |
